
Mastering Raspberry Pi Remote Access for Free: The Ultimate Guide
By Sophia Edwards
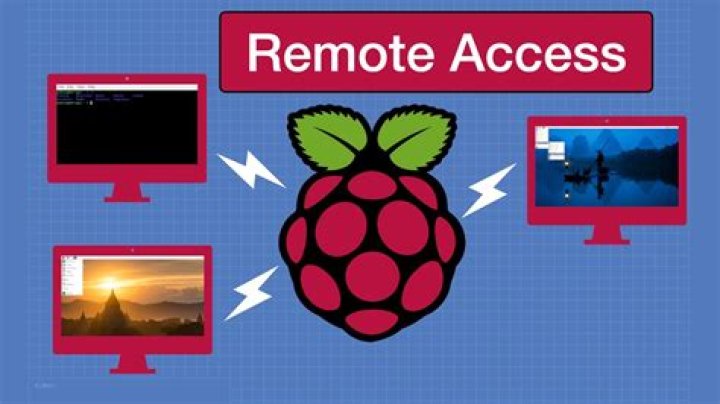
Raspberry Pi remote access free is a powerful solution for tech enthusiasts and professionals alike who want to manage their devices remotely without incurring additional costs. Whether you're a hobbyist or a seasoned developer, learning how to remotely access your Raspberry Pi can open up countless possibilities for automation, monitoring, and project management. This guide will walk you through everything you need to know about setting up and managing your Raspberry Pi remotely, ensuring you get the most out of this versatile device.
Remote access to Raspberry Pi allows users to interact with their device from anywhere in the world, provided they have an internet connection. This capability is particularly useful for managing servers, running IoT projects, or even setting up media centers. With the right tools and configurations, you can achieve seamless remote access without spending a dime.
In this comprehensive guide, we will explore various methods to set up Raspberry Pi remote access free, discuss the best practices for secure connections, and provide step-by-step instructions to ensure a smooth setup process. Whether you're a beginner or an advanced user, this article will equip you with the knowledge and tools needed to harness the full potential of your Raspberry Pi remotely.
Introduction to Raspberry Pi
Raspberry Pi has become a staple in the world of embedded computing and DIY projects. This single-board computer offers immense flexibility and affordability, making it a favorite among hobbyists, educators, and professionals. One of the key features of Raspberry Pi is its ability to be accessed remotely, allowing users to manage and interact with their devices from anywhere.
What Makes Raspberry Pi Unique?
- Compact Size: Raspberry Pi fits in the palm of your hand, making it ideal for portable projects.
- Cost-Effective: With prices starting at under $35, Raspberry Pi offers incredible value for its capabilities.
- Versatile Applications: From home automation to server hosting, Raspberry Pi can be used in a wide range of applications.
Why Choose Free Remote Access?
While there are paid solutions available for remote access, opting for free methods can save you money while still providing reliable performance. Free remote access tools for Raspberry Pi are often just as effective as their paid counterparts, offering a variety of features and functionalities without the added cost. Additionally, using free tools allows you to learn and experiment with different methods, helping you find the best solution for your specific needs.
Advantages of Free Remote Access
- Cost-Effective: No need to invest in expensive software or services.
- Flexibility: Choose from a variety of tools and methods to suit your project requirements.
- Community Support: Many free tools have active communities that provide support and resources.
Methods for Raspberry Pi Remote Access
There are several methods to achieve Raspberry Pi remote access free. Each method has its own set of advantages and may be more suitable for certain use cases. Below, we will explore some of the most popular methods for remote access.
1. SSH (Secure Shell)
SSH is one of the most commonly used methods for remote access. It allows users to securely connect to their Raspberry Pi via a command-line interface. SSH is easy to set up and provides a high level of security, making it an ideal choice for many users.
2. VNC (Virtual Network Computing)
VNC enables users to access the graphical user interface (GUI) of their Raspberry Pi remotely. This method is particularly useful for projects that require a visual interface, such as media centers or desktop applications.
3. No-IP
No-IP is a dynamic DNS service that allows users to assign a static domain name to their Raspberry Pi, even if it has a dynamic IP address. This makes it easier to connect to your device remotely without needing to know its exact IP address.
Setting Up SSH
Setting up SSH on your Raspberry Pi is a straightforward process. Follow the steps below to enable SSH and connect to your device remotely.
Step-by-Step Guide
- Enable SSH on your Raspberry Pi by navigating to the Raspberry Pi Configuration menu and selecting the SSH option.
- Find the IP address of your Raspberry Pi by running the command
ifconfigin the terminal. - Use an SSH client, such as PuTTY (for Windows) or Terminal (for macOS/Linux), to connect to your Raspberry Pi using its IP address.
For added security, consider changing the default SSH port and using key-based authentication instead of passwords.
Using VNC for Remote Access
VNC allows users to access the graphical interface of their Raspberry Pi remotely. This method is particularly useful for projects that require a visual interface. To set up VNC, follow these steps:
Installation and Configuration
- Install the VNC Server on your Raspberry Pi by running the command
sudo apt-get install realvnc-vnc-server realvnc-vnc-viewer. - Enable VNC by navigating to the Raspberry Pi Configuration menu and selecting the VNC option.
- Use a VNC client, such as RealVNC Viewer, to connect to your Raspberry Pi from another device.
VNC provides a more user-friendly experience compared to SSH, especially for beginners or those who prefer a graphical interface.
Remote Access with No-IP
No-IP is a dynamic DNS service that assigns a static domain name to your Raspberry Pi, making it easier to connect to your device remotely. Here's how you can set it up:
Setting Up No-IP
- Create a free account on the No-IP website and register a hostname for your Raspberry Pi.
- Install the No-IP DUC (Dynamic Update Client) on your Raspberry Pi by running the command
sudo apt-get install noip2. - Log in to the No-IP client using your account credentials and start the service.
With No-IP, you can access your Raspberry Pi using a domain name instead of an IP address, which is especially useful if your device has a dynamic IP.
Securing Your Remote Connection
Security is a critical consideration when setting up remote access for your Raspberry Pi. Follow these best practices to ensure your connection remains secure:
Security Tips
- Change the default SSH port to a non-standard port to reduce the risk of unauthorized access.
- Use key-based authentication instead of passwords for SSH connections.
- Regularly update your Raspberry Pi's software and firmware to patch any security vulnerabilities.
- Use a firewall to restrict access to your Raspberry Pi and only allow connections from trusted IP addresses.
Troubleshooting Common Issues
While setting up remote access for your Raspberry Pi, you may encounter some common issues. Below are solutions to some of the most frequently encountered problems:
1. Unable to Connect via SSH
If you're unable to connect to your Raspberry Pi via SSH, ensure that SSH is enabled and check your IP address configuration. Additionally, verify that your firewall settings allow SSH connections.
2. VNC Connection Issues
If you're experiencing issues with VNC, ensure that the VNC server is running on your Raspberry Pi and that your VNC client is configured correctly. Restarting the VNC service on your Raspberry Pi may also resolve the issue.
Best Practices for Remote Access
To make the most of your Raspberry Pi remote access setup, follow these best practices:
1. Regularly Backup Your Data
Ensure that you regularly back up your Raspberry Pi's data to prevent data loss in case of hardware failure or other issues.
2. Document Your Setup
Keep detailed documentation of your remote access setup, including IP addresses, port numbers, and any configuration changes you make. This will help you troubleshoot issues more effectively in the future.
Conclusion and Next Steps
Raspberry Pi remote access free offers a cost-effective and versatile solution for managing your device remotely. By following the methods and best practices outlined in this guide, you can set up a secure and reliable remote connection to your Raspberry Pi. Whether you're using SSH, VNC, or No-IP, the possibilities for remote access are endless.
We encourage you to share your thoughts and experiences in the comments section below. If you found this guide helpful, consider sharing it with others who may benefit from it. Additionally, explore other articles on our site for more tips and tutorials on Raspberry Pi and related technologies.
Remember, the key to mastering Raspberry Pi remote access lies in experimentation and practice. Keep exploring, learning, and building, and you'll unlock the full potential of your Raspberry Pi in no time!


