
Mastering Remote Access Raspberry Pi on Windows 10: The Ultimate Guide
By Mia Phillips
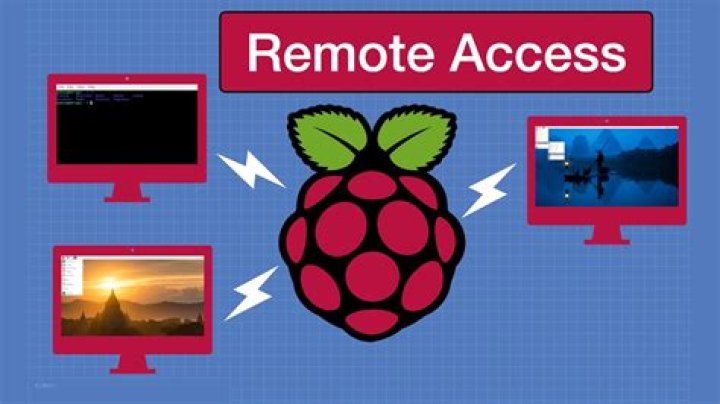
Remote access to a Raspberry Pi from a Windows 10 device has become increasingly essential for developers, hobbyists, and tech enthusiasts. Whether you're managing a home automation system or running server applications, understanding how to establish a secure and efficient remote connection can transform the way you work with your Raspberry Pi. In this comprehensive guide, we'll walk you through everything you need to know about setting up and troubleshooting remote access between Raspberry Pi and Windows 10.
Remote access offers flexibility and convenience, allowing you to control your Raspberry Pi from anywhere in the world. This is particularly useful if your Raspberry Pi is located in a different room, building, or even country. By mastering this skill, you'll be able to streamline your workflow, save time, and enhance productivity.
Before we dive into the technical details, it's important to note that setting up remote access requires some basic knowledge of networking, IP addresses, and security protocols. However, don't worry if you're new to this—this guide will break down each step in an easy-to-follow manner, ensuring that even beginners can successfully configure their remote connections.
Table of Contents
Introduction to Remote Access Raspberry Pi on Windows 10
Configuring SSH on Raspberry Pi
Using VNC for Remote Desktop Access
Securing Your Remote Connection
Best Practices for Remote Access
Introduction to Remote Access Raspberry Pi on Windows 10
Remote access to Raspberry Pi from Windows 10 is a powerful tool for managing your projects without needing physical access to the device. This method allows you to execute commands, transfer files, and even control the graphical interface remotely. Whether you're debugging code or monitoring server performance, remote access simplifies the process significantly.
There are several methods to achieve remote access, including SSH (Secure Shell) and VNC (Virtual Network Computing). Each method has its own advantages and use cases, which we'll explore in detail throughout this guide. By the end, you'll have a solid understanding of which option suits your needs best.
Additionally, we'll discuss security considerations and best practices to ensure that your remote connections remain safe and reliable. In today's interconnected world, protecting your devices from unauthorized access is more important than ever.
Prerequisites for Setup
Before you begin setting up remote access Raspberry Pi on Windows 10, ensure you have the following prerequisites in place:
- A Raspberry Pi device with Raspbian or any compatible operating system installed.
- A Windows 10 computer with administrative privileges.
- A stable internet connection for both devices.
- The IP address of your Raspberry Pi (which can be found using tools like ifconfig or ip addr).
- Basic knowledge of command-line interfaces and networking concepts.
Having these prerequisites ready will make the setup process smoother and more efficient. If you're missing any of these, take the time to prepare them before proceeding.
Configuring SSH on Raspberry Pi
SSH is one of the most popular methods for remote access Raspberry Pi on Windows 10. It provides a secure way to connect to your Raspberry Pi via the command line. To enable SSH on your Raspberry Pi, follow these steps:
Step 1: Enable SSH on Raspberry Pi
By default, SSH is disabled on Raspberry Pi OS for security reasons. To enable it, open the Raspberry Pi Configuration tool by typing the following command in the terminal:
sudo raspi-config
Once the configuration menu opens, navigate to "Interfacing Options" > "SSH" > "Enable." After enabling SSH, reboot your Raspberry Pi to apply the changes.
Step 2: Find Your Raspberry Pi's IP Address
To connect to your Raspberry Pi via SSH, you need to know its IP address. You can find this by typing the following command in the terminal:
hostname -I
This will display the IP address assigned to your Raspberry Pi by your network.
Connecting via SSH
Once SSH is enabled and you have the IP address of your Raspberry Pi, you can connect to it from your Windows 10 machine using a tool like PuTTY or Windows PowerShell. Here's how:
Using PuTTY
Download and install PuTTY from the official website. Open the application and enter the IP address of your Raspberry Pi in the "Host Name (or IP address)" field. Set the connection type to "SSH" and click "Open." You'll be prompted to enter your Raspberry Pi's username and password to establish the connection.
Using Windows PowerShell
Windows 10 includes built-in SSH functionality. Open PowerShell and type the following command, replacing the IP address with your Raspberry Pi's:
ssh pi@192.168.1.100
Enter your Raspberry Pi's password when prompted, and you'll be connected to the device.
Using VNC for Remote Desktop Access
While SSH is great for command-line access, VNC allows you to access the full graphical desktop of your Raspberry Pi remotely. Here's how to set it up:
Step 1: Install VNC Server on Raspberry Pi
Install the RealVNC server by typing the following commands in the terminal:
sudo apt update
sudo apt install realvnc-vnc-server realvnc-vnc-viewer
Once installed, enable the VNC server by navigating to "Preferences" > "Raspberry Pi Configuration" > "Interfaces" > "VNC" > "Enable."
Step 2: Connect Using VNC Viewer
Download and install VNC Viewer on your Windows 10 machine. Enter the IP address of your Raspberry Pi and click "Connect." You'll be prompted to enter your Raspberry Pi's credentials to access the desktop interface.
Securing Your Remote Connection
Security is paramount when setting up remote access Raspberry Pi on Windows 10. Here are some tips to keep your connections safe:
- Use strong, unique passwords for your Raspberry Pi.
- Consider enabling two-factor authentication (2FA) for added security.
- Regularly update your Raspberry Pi's software to patch vulnerabilities.
- Limit SSH access to specific IP addresses using firewall rules.
- Disable password-based authentication and use SSH keys instead.
By following these best practices, you can minimize the risk of unauthorized access and protect your data.
Troubleshooting Common Issues
Even with careful setup, you may encounter issues when trying to establish remote access Raspberry Pi on Windows 10. Here are some common problems and their solutions:
Issue 1: Unable to Connect via SSH
If you're unable to connect via SSH, ensure that:
- SSH is enabled on your Raspberry Pi.
- The IP address you're using is correct.
- Firewall rules aren't blocking the connection.
Issue 2: VNC Connection Fails
If VNC isn't working, check the following:
- VNC server is installed and running on your Raspberry Pi.
- The correct IP address is entered in VNC Viewer.
- Network settings aren't restricting VNC traffic.
Advanced Techniques
Once you're comfortable with basic remote access, consider exploring advanced techniques such as:
- Setting up a static IP address for your Raspberry Pi.
- Configuring port forwarding on your router for remote access outside your local network.
- Using SSH tunnels for secure data transfer.
These techniques can further enhance your ability to manage your Raspberry Pi remotely.
Best Practices for Remote Access
To ensure a smooth and secure remote access experience, follow these best practices:
- Regularly back up your Raspberry Pi's data.
- Monitor system logs for unusual activity.
- Limit the number of devices that can access your Raspberry Pi remotely.
- Keep your software and firmware up to date.
By adhering to these guidelines, you'll maintain a reliable and secure remote access setup.
Conclusion and Next Steps
Remote access Raspberry Pi on Windows 10 opens up a world of possibilities for managing and interacting with your devices. By following the steps outlined in this guide, you can establish secure and efficient connections using SSH and VNC. Remember to prioritize security and regularly update your systems to protect against potential threats.
We encourage you to experiment with the advanced techniques mentioned and explore additional tools and methods for remote access. If you found this guide helpful, please share it with others or leave a comment below. For more tips and tutorials, check out our other articles on Raspberry Pi and Windows 10 integration.


